

Don’t Let a Leaking Vape Cart Ruin Your Session
A leaking vape cart can spoil the moment and upset even calm users. Many people panic, thinking their device is broken and done. The truth is different. Most leaks have clear causes and simple solutions. By learning how to fix a leaking vape cart, you keep control and avoid waste. You protect your oil, preserve flavor, and save money over time.
Leaks are common because carts face heat, rough storage, or weak seals inside. These small issues push oil out and create the mess. Once you know the causes, the path to repair feels easy. With gentle cleaning, steady care, and upright storage, leaks can stop. Quick action restores your cart to normal. Stay calm, follow these steps, and enjoy smooth sessions again.
Why Do Vape Carts Leak?
Understanding the Problem Before Fixing It
Overfilling is a common cause of leaks. Adding too much oil raises pressure inside the tank. That pressure forces extra oil through weak seals and makes messy leaks appear. The simple act of filling too much often leads to waste. When people ask why is my vape cart leaking, this cause is often the reason.
Heat exposure is another key reason. When oil warms up, it becomes thin and flows fast. Heat expands the air inside, pushing oil through tiny weak points. Warm rooms or direct sun can quickly cause unwanted drips.
Poor storage also leads to problems. If carts are stored flat, oil shifts and blocks airflow. This forces liquid into areas not meant to hold it. The best method is always upright storage. It keeps the balance steady inside the tank.
A faulty coil or seal is another issue. Over time, coils wear out or seals lose their hold. These worn parts create gaps and let oil escape. Replacing small broken pieces is often the only solution here.
Leaking from the top shows up near the mouthpiece. This often means loose parts or dirty threads cause oil buildup. Cleaning and tightening the top helps restore use. This type of vape cartridge troubleshooting can solve top leaks fast.
Leaking from the bottom happens near the battery connection. This usually points to weak seals or damaged threads. If this happens often, new parts or full replacement is the best step.
Tools and Supplies You’ll Need
Be Prepared Before You Start
Tools
Cotton Swabs
Vape not hitting? Cotton swabs are simple yet effective tools for cleaning. They reach tiny spots where oil collects. During vape cartridge troubleshooting, swabs absorb sticky residue and keep airflow clear. Without swabs, leaks grow worse. Always keep a few nearby when working with your cart.
Rubbing Alcohol
Rubbing alcohol is important for cleaning. It breaks down thick oil and kills germs. When used with cotton swabs, it restores battery contact points and prevents blockages. A small amount is enough. Apply with care to avoid spilling extra fluid. This step ensures parts stay functional for longer use.
Tissue Paper
Tissue is essential for controlling mess. Leaking oil spreads quickly, but tissue absorbs it fast. Keep several sheets ready before starting. Tissues prevent sticky hands and protect surfaces from stains. They also help you wipe off tools after cleaning. Clean surroundings make the process easier and less stressful.
Supplies
Storage Tube
A storage tube keeps carts upright and stable. Upright storage reduces pressure on seals and lowers leak risk. Tubes are portable, making them perfect for carrying carts safely. Using storage tubes keeps your oil intact and extends the life of each cartridge.
Spare Mouthpiece
A spare mouthpiece can solve issues fast. Cracks or loose fittings often cause top leaks. Replacing the mouthpiece saves the cart from further trouble. Always have a spare ready in case problems appear suddenly.
Rubber Gloves
Rubber gloves keep your hands safe from sticky oil. They add grip and stop slipping. Clean hands allow steady work when handling delicate parts. Gloves also protect skin from alcohol. They are not required, but they help a lot during cleaning.
Airtight Container
A small airtight container is useful for storage. It locks out air and keeps oil fresh. When carts are half used, airtight storage stops leaks and protects quality. These containers add another layer of safety and make travel easier.
Step-by-Step Fix: Leaking from the Top
How to Handle Oil Around the Mouthpiece
Step 1: Remove from Battery

Start by removing the cart from the battery with care. This step prevents added damage and limits oil from spreading further. Gentle removal also makes the later cleaning easier. Take your time so the cart remains intact. Slow moves stop oil from flowing into other parts.
Step 2: Clean Excess Oil
Use cotton swabs to wipe away oil around the top area. Make sure to reach the threads and edges, as buildup here causes issues. Removing oil helps the air flow stay smooth for better draws later. This step is vital during vape cart leaking from top problems, since oil buildup blocks normal use. Wipe slowly and use fresh swabs until no oil remains.

Step 3: Secure the Mouthpiece

After cleaning, carefully screw the mouthpiece back onto the cart. Tight threads reduce the chances of more oil escaping. Do not overtighten, since too much weakens seals. A steady twist is enough. This balance between tightness and safety keeps parts aligned. It also improves the chance of sealing leaks fully.
Step 4: Store Upright
Once cleaned and reassembled, place the cart upright in a secure spot. Upright storage allows oil to settle evenly. This simple action lowers pressure on seals and prevents leaks from forming again. Consistent upright storage is one of the best habits. It reduces future problems and keeps your cart reliable for longer use.
Step-by-Step Fix: Leaking from the Bottom
When Oil Escapes Near the Battery
Step 1: Detach Cartridge
Begin by gently detaching the cartridge from the battery. Slow removal prevents extra oil from spreading into sensitive parts. This careful move also reduces stress on the battery threads and keeps connections secure. Rushed pulling may bend contacts, so take steady action. Detaching properly sets the stage for a clean and safe fix.

Step 2: Clean Connection Port
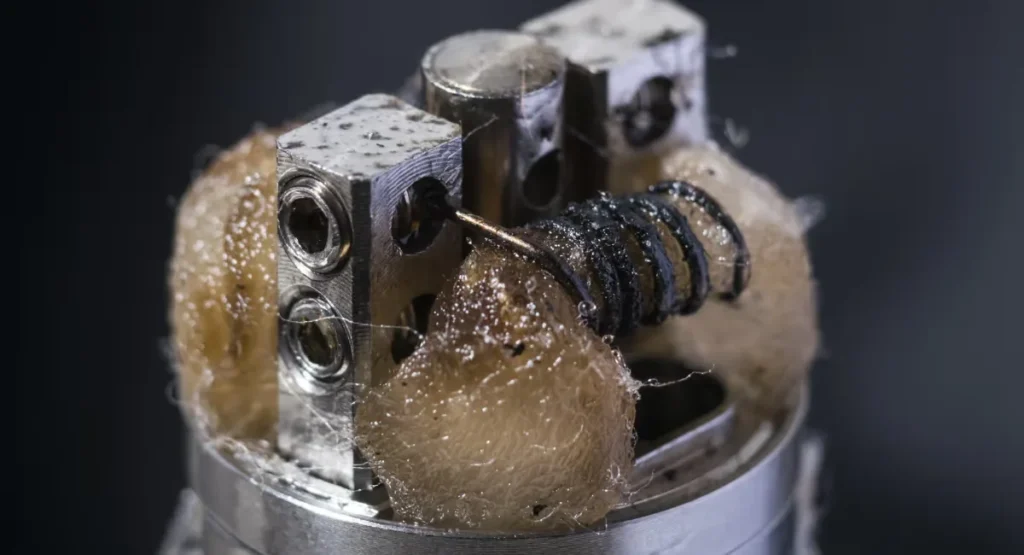
Once the cartridge is off, focus on the connection port. Use a cotton swab lightly dipped in rubbing alcohol to clear away oil and grime. Swab around the metal contacts until no residue remains. This step restores smooth current flow between the battery and the cart. It is crucial when dealing with a vape cart leaking from bottom, because the oil here blocks the power. Cleaning fully ensures the device works as intended and limits further leaks.
Step 3: Check O Rings or Seals
Check the seals and small O Rings closely. Look for cracks or signs of flattening. Damaged seals fail to hold back oil, leading to steady leaks. Replace worn parts if possible. This inspection step is vital for safety and function. Ignoring broken seals means leaks will return quickly, even after cleaning. Fresh O Rings restore the tight hold that keeps oil inside.

Step 4: Choose a New Cartridge
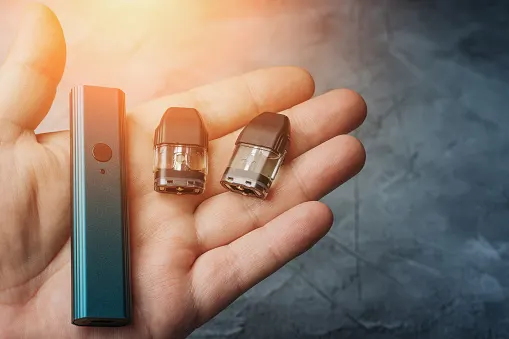
If leaks continue after cleaning, replacement is the only wise option. Some cartridges wear down beyond simple repair. Constant leaks waste oil and damage batteries over time. A new cartridge prevents further trouble and gives peace of mind. Sometimes fixing a vape cart leaking from bottom means knowing when to stop and choose replacement.
Preventing Future Leaks
Keep Your Vape Cart in Perfect Shape
Store Upright
Keeping carts standing upright in a cool, dark place helps stop leaks. Storing them flat lets oil move into parts not built for it. Upright storage keeps the balance steady inside the tank and lowers risk. This habit protects the battery port from clogs. A small holder or storage tube is helpful. Many people forget this simple action, yet it saves oil and extends cart life. Good storage is often the first step in a leaking vape cartridge fix plan.
Avoid Overtightening
When attaching a cart to its battery, avoid twisting with too much force. Overtightening flattens small seals and breaks threads. Once seals are damaged, leaks return even after cleaning. A gentle twist secures the connection without stress. Gentle care during every connection is essential for keeping oil contained. Over time, this step lowers the chances of leaks starting near the battery.
Protect from Heat
Heat is one of the strongest causes of leaking carts. Direct sunlight or warm rooms thin oil and push it through weak spots. Always store your cart in shaded places. Avoid leaving it in a hot car. Heat speeds up leaks and weakens flavors. Protecting your cart from heat extends its use and preserves taste. This small choice matters more than many realize. If leaks happen often, check how and where your cart is stored.
Draw Correctly
Smoke a joint without canoeing, Many leaks come from improper drains. Strong pulls flood coils and upset the oil balance. Use slow, steady pulls instead. This keeps airflow smooth and oil in place. Avoid long, harsh drags that force oil into seals. Practicing a steady draw method improves vapor quality, too. A gentle draw style not only helps prevent leaks but also extends coil life. Among all habits, correct draws gives lasting results. Combining this with safe storage creates a strong, leaking vape cartridge fix method that works daily.
Storage Tips for Half Used Carts
Save Oil Without Waste
Upright in Doob Tubes
Always stand half-used carts upright inside doob tubes for safety. Upright storage keeps oil balanced inside the chamber and prevents it from flooding coils. It also lowers the chance of leaks near the mouthpiece. Doob tubes add an extra layer of security during daily use. Consistent upright storage is a smart routine that saves oil over time.
Airtight Containers
Place carts in airtight containers with humidity packs to preserve oil quality. Airtight storage blocks outside air and keep carts fresh. Humidity packs maintain balance, stopping oil from thickening or drying. This simple method extends the life of your cart and improves its performance. For people seeking a steady fix leaking weed cart method, airtight storage works well. Keeping containers nearby makes durable storage simple and effective.
Travel Tips
When traveling, always carry carts in padded holders or cases. This protects them from cracks and sudden leaks. Avoid leaving carts in direct sunlight or hot cars during trips. Travel-friendly cases maintain an upright position and shield delicate parts. For long journeys, keep containers in cool bags to prevent oil thinning. Following these travel tips keeps carts safe and reduces problems on the road. Safe travel habits combine with storage methods to save oil and avoid waste.
When to Replace Instead of Fix
Know When It’s Not Worth It
Cracked Glass
A cracked glass tank is a sign of trouble that cannot be ignored. Even a small crack weakens the tank and allows oil to seep out constantly. Once glass loses its full strength, no cleaning or tightening will restore its hold. Using a cracked tank creates waste and risks messy spills. The only smart solution is full replacement with a fresh, intact cart. Replacement saves oil, avoids frustration, and ensures the device works safely again.
Broken Seals
Seals serve as the main barrier against leaks, but they wear down with time. Torn or flattened seals let oil escape, no matter how careful you are. Cleaning does not repair broken seals. Once seals fail, the cart is no longer reliable. Replacing the entire cartridge ensures safe use and prevents future problems. Worn seals signal that the lifespan of the cartridge has ended. Choosing a new one is the sure way to restore consistent function.
Constant Leaks
Sometimes leaks keep returning even after several attempts at cleaning and repairs. If you clean threads, tighten parts, and still see oil, the cart has reached its limit. Constant leakage wastes oil and harms battery connections. At this point, relying on a leaking vape cartridge fix is no longer helpful. Replacing the cart fully saves time and protects your battery. Knowing when to stop fixing and choose replacement avoids more frustration and wasted oil.
Conclusion
Fix It Once, Prevent It Forever
Leaks happen for many reasons. However, most are simple to repair with care. Overfilling, heat, weak seals, and poor storage often cause issues. Quick cleaning, careful tightening, and upright storage prevent leaks from spreading. By learning how to fix a leaking vape cart, you protect oil, extend cart life, and enjoy smoother sessions without waste. Understanding common causes and using steady fixes makes the entire process simple and effective.
Proper storage is vital. Always keep carts upright, in cool, dark spaces, and away from heat. Avoid cheap carts since poor-quality parts leak faster. Choosing standard carts reduces risk and saves money. Safe storage methods add even more protection. Small habits practiced daily ensure carts remain reliable and enjoyable for longer use.
Protect your oil, protect your session, use these fixes today. Simple steps save time and stress. Follow proven methods, and you will see real results. Good habits today stop problems tomorrow. Safe storage, steady care, and wise buying choices ensure leaks become rare events, not constant problems. Visit Alaska Cannabis Exchange for trusted guidance and quality cannabis solutions..
FAQs
Vape Cart Questions Answered
A cart may leak when left unused because oil shifts inside when stored flat. Always keep it standing upright in a cool and dark place. Flat storage pushes oil into small gaps not made to hold it. This movement creates leaks that appear later. Practicing upright storage is one of the first habits in vape cartridge troubleshooting. It prevents buildup, reduces mess, and preserves oil quality even when the cart is resting.
Yes, you can, but take careful steps before use. Clean away oil on the threads, the mouthpiece, and the battery port. Leaking oil blocks airflow and harms battery contact points. If you learn how to fix a leaking vape cart, the cart can still be used safely. However, repeated leaks mean the cart may soon fail. Use short sessions to test performance. If leaks return, replacement is the wiser choice.
Yes, temperature plays a huge role in leaks. Heat thins oil, making it run into weak seals. Cold thickens oil, creating clogs that push oil into the wrong areas. Always store carts in cool but not freezing conditions. Balanced storage lowers leaks and maintains taste. Avoid hot cars, heaters, or windows. Stable storage adds life to your cart and is vital during vape cartridge troubleshooting.
Yes, cheap carts are more prone to leaks. Weak seals, thin glass, and poor threads cause fast failures. Many ask why is my vape cart leaking soon after buying low-quality carts. Investing in quality carts avoids these issues. Stronger seals, tested coils, and durable tanks resist leaks. Spending a little more saves oil, extends use, and lowers frustration. Choosing quality is an easy method of prevention and supports every how to fix a leaking vape cart guide.